Grinding a Poodle’s Nails
Let's be honest: for many Poodle owners, nail trims are right up there with a trip to the dentist – full of dread, a bit of flinching, and sometimes, a whole lot of drama. The sound of those clippers, the fear of hitting the quick, the sudden yelp from your sensitive Poodle… it can be enough to make you push off the task longer than you should. But overgrown nails aren't just an aesthetic issue; they can lead to discomfort, pain, and even long-term health problems for your beloved companion. This comprehensive guide will walk you through everything you need to know about grinding your Poodle's nails, offering a gentler, safer, and often more effective alternative to traditional clipping that can transform nail care from a battle into a bonding experience.
Why Nail Grinding is a Game-Changer for Poodles
If you've ever battled with nail clippers, you know the anxiety it can cause for both you and your Poodle. The distinct 'crack' of the clippers, coupled with the potential pain of accidentally cutting into the quick, often makes the whole experience a stressful ordeal. For Poodles, who are known for their intelligence and sensitivity, this stress can lead to a lasting aversion to paw handling, making future grooming tasks even harder.
The Dreaded "Quick" and Poodle Sensitivity
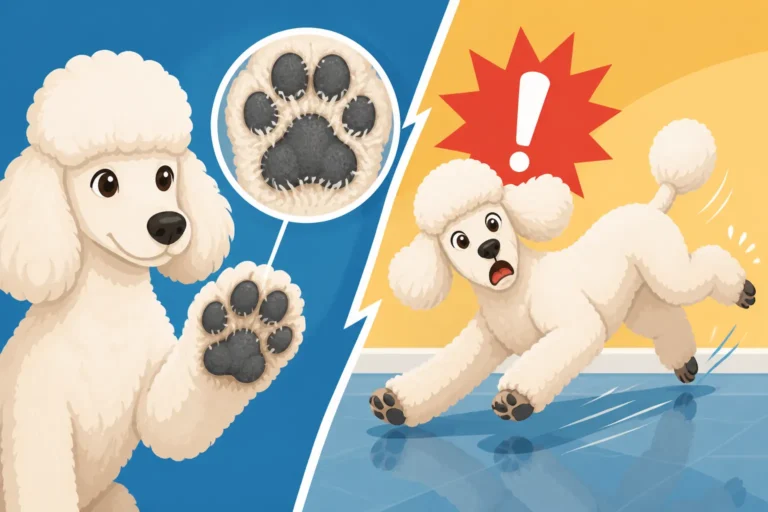
Every dog's nail contains a blood vessel and nerve called the "quick." It grows with the nail, and if you cut too short, it bleeds profusely and is incredibly painful. Poodles, especially those with darker nails, make the quick particularly challenging to see, making clipping a nerve-wracking guesswork game. Many Poodles also have a very refined sense of touch and can be quite sensitive to pressure and sudden movements around their paws. This inherent sensitivity, combined with the often startling sensation of clippers, can make them wary of having their feet touched, leading to resistance and even fear during nail care. It's not uncommon for a Poodle to "sulk" or become visibly upset after a bad nail trimming experience. This is why a less invasive method is often preferable.
Imagine your Poodle pulling their paw away, or even trying to bite, purely out of fear, not aggression. This is a common scenario when clippers are involved, especially if they've had a quicking incident in the past. The memory of that sharp pain or the uncomfortable squeeze of the clippers can linger, creating a powerful negative association. A consistent routine of Getting a Poodle Puppy Used to Being Handled from a young age can certainly help, but even well-socialized Poodles can develop an aversion to clippers if they've had a bad experience. Grinding offers a way to bypass much of that direct, sudden pressure and sound, reducing the chances of a painful mishap.
Smoother, Shorter Nails Without the Stress
Nail grinding offers several key advantages over clipping, especially for Poodles. First and foremost, it allows for much more precise control. Instead of making one big cut, you remove tiny layers of nail at a time. This significantly reduces the risk of hitting the quick, making the process safer and less stressful for everyone involved. The gradual removal also encourages the quick to recede over time, meaning you can achieve shorter nails more safely with consistent grinding, which is harder to do with clippers.
Beyond safety, grinding leaves your Poodle's nails with a smooth, rounded edge. Clipped nails often have sharp edges that can snag on carpets, furniture, or even scratch you or your Poodle during play. Smooth nails are more comfortable for your dog, reduce the likelihood of accidental scratches, and simply look tidier. This is particularly beneficial for Poodles who are active, whether it's through Poodle agility and rally titles or just romping around the house. When your Poodle's nails are properly maintained, it improves their gait, weight distribution, and overall comfort, which is vital for their long-term joint health.
Choosing the Right Nail Grinder for Your Poodle
The market is flooded with nail grinders, and picking the right one for your Poodle can feel a bit overwhelming. Factors like noise level, power, and ease of use all play a significant role in making the experience positive for both you and your sensitive companion. Investing in a good quality grinder tailored to your Poodle's size and temperament will make a world of difference.
Corded Versus Cordless Grinders
When it comes to power, you'll generally find two types: corded and cordless. Each has its pros and cons:
- Corded Grinders: These typically offer more consistent power and don't require battery charging, meaning you won't run out of juice mid-grind. They can be more powerful, which is great for thicker nails, but the cord can sometimes be cumbersome, and you're tethered to an outlet. For larger Standard Poodles with sturdy nails, a powerful corded option might be appealing for its efficiency.
- Cordless Grinders: These offer maximum flexibility and portability, allowing you to groom anywhere – perhaps even outdoors where the sound might be less jarring. However, battery life can vary, and power might wane as the battery depletes. You'll need to remember to charge it regularly. For Toy and Miniature Poodles, or for quick touch-ups, a cordless model often provides enough power and the convenience is unbeatable. Many owners find the freedom of a cordless grinder allows them to work in different, less intimidating environments for their Poodle.
Consider your grooming routine and where you plan to do most of your nail care. If you have a designated grooming spot with an outlet, corded might be fine. If you prefer to move around or take it with you on trips, cordless is the way to go. You can often find a wide selection of both types available on Amazon or Chewy, with customer reviews to help guide your choice.
Noise Levels and Vibration
Poodles can be quite sensitive to sound. A noisy grinder can be a huge deterrent, triggering anxiety and resistance from your dog. Look for models explicitly advertised as "low noise" or "quiet." Many modern grinders use brushless motors or have special dampening features to minimize sound. It's not just the sound, though; the vibration can also be off-putting. Some grinders vibrate more intensely than others, and your Poodle might dislike the sensation as much as, or even more than, the noise.
When researching grinders, pay close attention to reviews regarding sound and vibration. Sometimes, even if the sound isn't too loud to your ears, the high-frequency whine might be irritating to your Poodle's more sensitive hearing. Starting with the quietest option available is usually the best bet to ensure a positive first impression and build trust around the grooming tool.
Grinding Stone and Band Options
The actual grinding surface comes in different forms:
- Grinding Stones: These are usually more durable and can last a long time, often simply needing a cleaning. They tend to be coarser, which can remove nail material faster but might generate more heat if used improperly.
- Sanding Bands: These are replaceable sleeves, usually made of sandpaper-like material. They wear out and need to be changed regularly, but they offer a finer, smoother finish and tend to generate less heat than some stones. They are generally gentler on the nail and are excellent for gradual removal.
Most grinders come with a selection of grinding heads or bands. It's a good idea to have a variety on hand. A coarser grit might be useful for initial shaping, while a finer grit can be used for smoothing and getting close to the quick without causing discomfort. Always ensure you can easily find replacement bands or stones for your chosen model.
Here's a quick comparison of grinder features to help you decide:
| Feature | Corded Grinder | Cordless Grinder | Consideration for Poodles |
|---|---|---|---|
| Power | Consistent, often higher RPM | Varies, can decrease with battery drain | More power is good for thicker nails (Standard Poodle) but may be louder. |
| Portability | Limited by cord length, needs outlet | Excellent, can use anywhere | Flexibility to find a quiet, comfortable spot is great for sensitive Poodles. |
| Noise Level | Can be louder due to motor power | Often designed for quieter operation | Crucial for Poodles; prioritize "low noise" models. |
| Vibration | Varies, check reviews | Varies, check reviews | Discomfort from vibration can be as bad as noise for some Poodles. |
| Battery Life | N/A | Crucial consideration, usually 1-2 hours | Ensure enough charge for a full session or multiple quick ones. |
| Maintenance | Keep motor vents clear | Charge regularly, replace battery if needed | Overall maintenance is low for both types. |
| Cost | Mid-range to high-end | Entry-level to high-end | Good quality is an investment in your Poodle's comfort and health. |
A Gentle Approach: Desensitizing Your Poodle to the Grinder
You can't just spring a noisy, vibrating tool on your Poodle and expect them to be thrilled. Successful nail grinding starts long before the grinder even touches a nail. The key is desensitization – gradually introducing the tool in a positive way, building trust and comfort over time. This process requires patience, high-value treats, and a deep understanding of your Poodle's sensitive nature. This is similar to the approach you'd take when Desensitizing a Poodle to Clippers, even if the tool is different.
Introduction to the Tool
Start by simply letting your Poodle investigate the grinder while it's off. Place it on the floor, let them sniff it, perhaps even lick it. Every interaction, no matter how small, should be accompanied by praise and a super high-value treat. Don't push it; let them approach it on their own terms. The goal here is to establish a positive association: "Grinder = yummy treats." Do this for a few days, or until your Poodle shows no hesitation in approaching the inert object.
Once they're comfortable with the off grinder, move on to introducing the sound and vibration. Turn the grinder on, but keep it far away from your Poodle – across the room, perhaps in another room. Let it run for a few seconds, then turn it off and immediately give a treat. Gradually decrease the distance over several sessions. The idea is to normalize the sound and vibration without any pressure on your Poodle. They should learn that the sound signals a treat is coming, not that something scary is about to happen to their paws. This might take days, or even a week, but rushing this step will only set you back.
Touch and Treat Method
Once your Poodle is unfazed by the sound and vibration from a distance, you can start introducing physical contact. With the grinder off, gently touch it to different parts of your Poodle's body – their back, shoulder, or side – while giving a treat. Keep these touches brief and positive. The goal is to show them that the grinder touching them isn't scary.
Next, turn the grinder on (again, away from their paws initially). Briefly touch the running grinder to a non-sensitive part of their body, like their back or thigh, for just a second, then immediately remove it and offer a treat. The key is brief and positive. Repeat this until they are relaxed with the running grinder touching their body. Only then, and very gently, start touching the running grinder to their paw, but not to the nail yet. Just touch the side of a toe or the top of their paw, followed by a treat. If they pull away, go back a step. Patience is paramount here. Your Poodle needs to trust that you won't hurt them.
The "Cookie Monster" Technique
This technique is a lifesaver for many sensitive Poodles. It involves a continuous stream of high-value treats to distract and reward your Poodle throughout the grinding process. Think of it as creating a positive feedback loop so strong that the grinder almost fades into the background.
Have a helper (if possible) feed your Poodle tiny, delicious treats non-stop while you work on one nail. Think soft, easy-to-chew treats that they absolutely adore. Small pieces of cheese, cooked chicken, or even specialized soft training treats from brands like Ollie can work wonders. While your Poodle is happily munching, you can work on one nail for a few seconds. The moment the treat flow stops, you stop grinding. This creates an association: "Grinder on = yummy food." As they get more comfortable, you can gradually extend the grinding time per treat. If your Poodle typically only gets certain treats during training, they'll learn to associate nail grinding with a special, high-reward event.
The Step-by-Step of Grinding Your Poodle's Nails
Once your Poodle is comfortable with the sound, vibration, and touch of the grinder, you're ready to start actually trimming their nails. Remember, the goal is not to get all the nails perfect in one session, especially initially. Short, frequent sessions are far more effective and less stressful than trying to tackle everything at once. This method is an extension of Nail Trims Between Poodle Grooms and aims to keep their nails in top condition year-round.
Setting the Scene for Success
Preparation is key. Choose a quiet, well-lit area where both you and your Poodle can be comfortable and minimize distractions. A non-slip surface is essential; a rubber mat or even a towel laid down can provide stability for your Poodle and prevent slips. Have all your supplies ready before you begin:
- Your nail grinder: Charged if cordless.
- High-value treats: Plenty of them!
- Styptic powder or cornstarch: Just in case you accidentally graze the quick. Even with careful grinding, accidents can happen, so being prepared alleviates stress.
- A towel or grooming loop: For gentle restraint if needed, but primarily for providing a secure hold on the paw.
- Good lighting: Essential for clearly seeing the nail and identifying the quick.
A good approach might be to have your Poodle lie down or sit comfortably. For smaller Toy Poodles, you might even hold them in your lap. For Standard Poodles, a grooming table with a non-slip surface can be ideal, allowing you to work at a comfortable height. Make sure your Poodle is relaxed before you even turn on the grinder.
The Grinding Motion
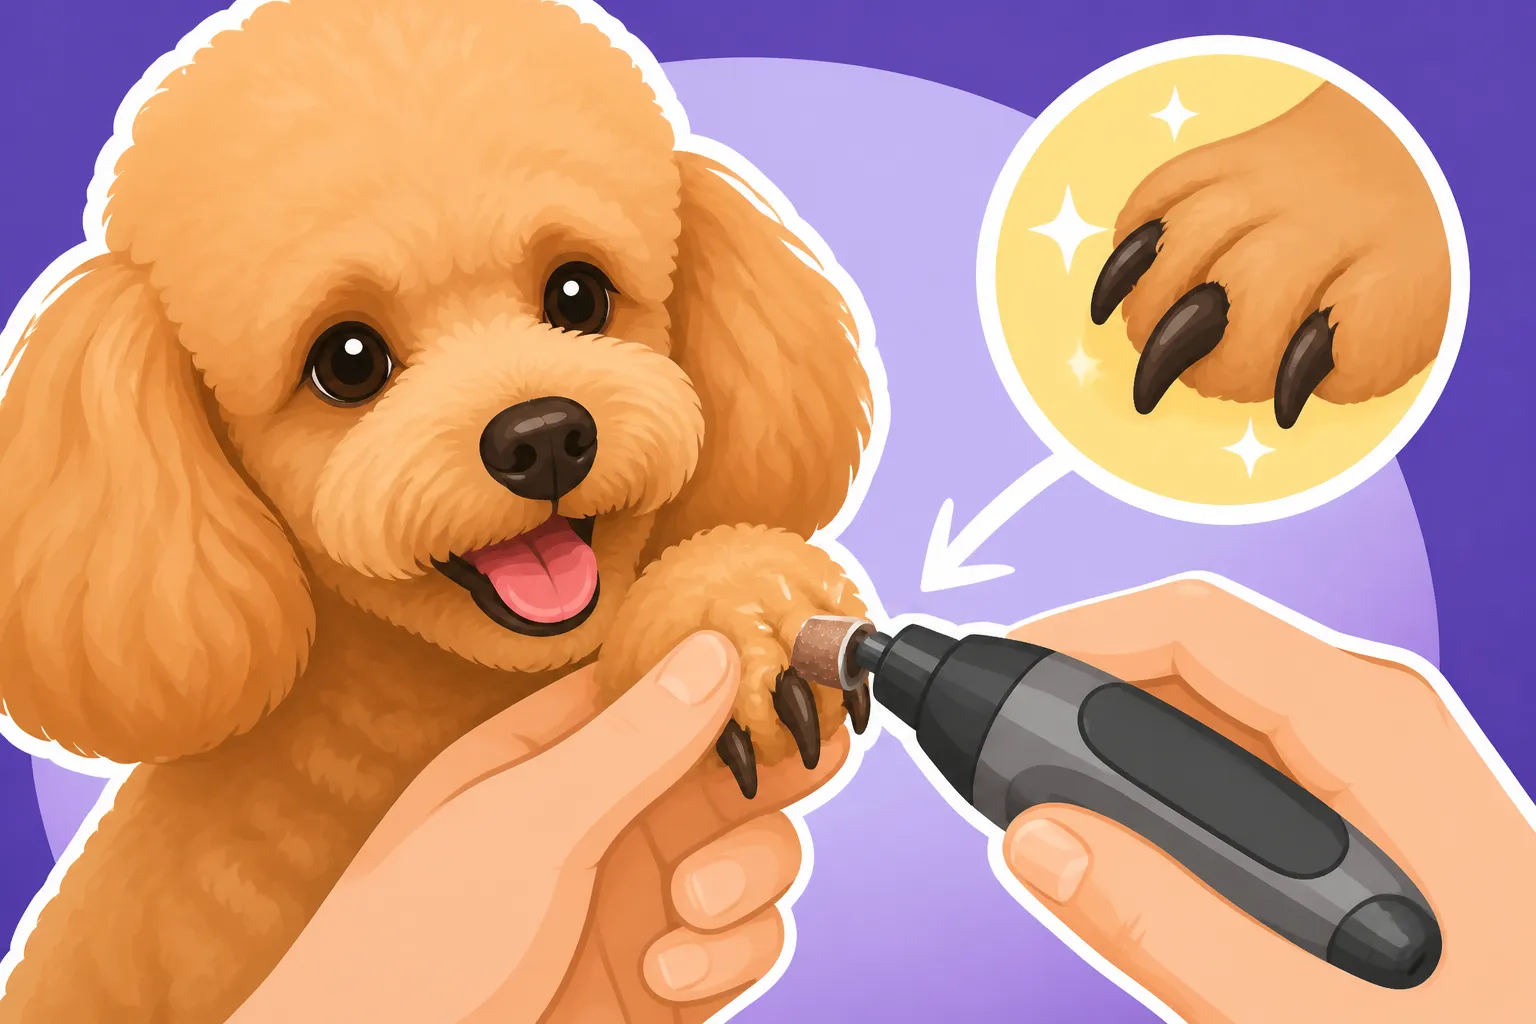
Holding your Poodle's paw gently but firmly, isolate the nail you want to work on. Push the hair back from the nail to prevent it from getting caught in the grinder – this is especially important with a Poodle's continuously growing coat. Hold the grinder at a 45-degree angle to the underside of the nail. You're aiming to grind from the bottom up, towards the tip, to shorten it and then round the edges.
Only apply light pressure and use short bursts of 2-3 seconds per nail. Grinding generates heat, and prolonged contact can make the nail uncomfortably warm for your Poodle. After a few seconds, lift the grinder, check the nail, and if needed, continue with another short burst. Rotate the nail as you grind to achieve a nice, smooth, rounded finish. Think of it like shaping rather than simply shortening. Work on the tip first, then the sides, until you achieve the desired length. For the dewclaws (if your Poodle has them), remember they tend to grow faster and thicker, so they might need extra attention.
Recognizing the Quick
This is the most critical part of nail care. The quick is the sensitive living tissue within the nail. In light-colored nails, it's typically visible as a pinkish area. However, most Poodles have dark nails, making the quick much harder to spot.
For dark nails, you'll need to rely on visual cues as you grind:
- Dry, flaky material: The outermost layer of the nail will appear dry and flaky as you grind.
- A "dusty" white ring: As you grind deeper, you'll start to see a small white or gray circle in the center of the nail.
- A dark "dot": Just before you hit the quick, you'll notice a small, dark, shiny dot appearing in the center of that white ring. This is your stop sign! It means you are very, very close to the quick.
Always err on the side of caution. It's better to leave the nails slightly longer and do another session in a few days than to quick your Poodle. With consistent grinding, the quick will gradually recede, allowing you to get the nails shorter and shorter over time. This consistent approach is far superior to trying to get them perfectly short in one go.
Troubleshooting and Maintaining Nail Health
Even with the best intentions and techniques, you might encounter bumps along the road. Your Poodle might still be anxious, you might accidentally quick them, or you might struggle to keep up with the maintenance. It's all part of the journey of pet ownership, and there are ways to address these challenges.
What if My Poodle Still Hates It?
If, despite all your efforts at desensitization and positive reinforcement, your Poodle still shows strong aversion or fear towards the grinder, don't despair. First, revisit the desensitization steps. Break them down even further. Perhaps your Poodle needs more time just hearing the sound from a distance before it comes closer. Consider if the treats you're using are truly "high-value" enough. Some Poodles respond best to novel, extra-tasty treats they only get for this specific activity.
It might also be helpful to seek professional assistance. Many professional groomers are incredibly skilled at Teaching a Poodle to Hold Still on the Table and can demonstrate proper technique, often with specialized equipment that might be quieter or more efficient. A vet technician can also provide guidance and demonstrate gentle handling techniques. Sometimes, seeing a calm professional handle the grinder can make a big difference for your Poodle. In extreme cases, if fear is causing genuine distress or aggression, consult with your veterinarian or a certified professional dog trainer who specializes in fear-based behaviors. They can offer tailored advice and potentially explore calming aids or specific behavioral modification protocols.
Over-Grinding and the Quick
Even with the utmost care, sometimes an accidental quicking can happen. If you do hit the quick, don't panic. The nail will bleed, and your Poodle will likely react with a yelp or a pull-back. Immediately apply styptic powder (or cornstarch if you don't have styptic powder) to the bleeding nail and apply gentle pressure until the bleeding stops. Reassure your Poodle calmly. Avoid scolding them, as this will only increase their fear.
Take a break. Don't try to continue grinding immediately. Offer comfort and extra special treats. The goal is to minimize the negative impact of the experience. You might need to take a day or two off from nail care before attempting it again, starting with the desensitization process once more, but focusing heavily on positive associations. Remember, the quick recedes with consistent grinding, so even if you quick them once, it doesn't mean you'll do it every time. The next time you approach that nail, you'll know where the quick is and can be extra cautious. You can find quality styptic powder easily on Amazon to keep on hand.
Consistency is Key
The secret to successful nail grinding and maintaining healthy nails for your Poodle is consistency. Regular, short sessions (ideally once a week or every two weeks) are far more effective than infrequent, long, stressful ones. When you grind frequently, the quick has a chance to recede, allowing you to keep the nails shorter over time. This also prevents them from getting so long that they cause discomfort or start impacting your Poodle's gait.
Overly long nails can force your Poodle's toes to splay, putting pressure on their joints and ligaments. This can lead to pain, arthritis, and even affect how they stand and walk. Think about how uncomfortable it would be if you had to walk around with shoes that were too small. Your Poodle's nails are their connection to the ground, and their health impacts their entire musculoskeletal system. Unnoticed pain from long nails could be a reason Why a Poodle Goes Quiet Before It Limps. Regular nail care, whether through grinding or careful clipping, is just as important as Poodle Dental Disease by Size or ear cleaning for your Poodle's overall well-being. By making nail grinding a regular, positive part of your Poodle's routine, you're investing in their comfort, health, and happiness for years to come.
Disclaimer
This article is for general informational purposes only and does not constitute professional advice. Laws, prices and regulations vary by location and change over time. Consult a qualified professional for guidance on your specific situation.