Clipping a Poodle at Home
The thought of saving money and having your Poodle look perfectly groomed sounds amazing, but then you stare at your furry friend, clippers in hand, and suddenly that perfect vision feels like a very hairy, very intimidating mountain to climb. Many of us have been there, feeling the pinch of professional grooming costs or the frustration of a rushed salon job that just doesn't quite capture your Poodle's charm. This guide is here to tell you that clipping your Poodle at home isn't just possible, it's a rewarding skill that can save you a bundle and deepen your bond with your beloved companion.
Why Consider Clipping Your Poodle at Home?
Let's be real: Poodles are gorgeous, but their magnificent coats come with a hefty maintenance tag. The endless growth means frequent trips to the groomer, and those bills really add up. Taking the clippers into your own hands might seem daunting, but there are some truly compelling reasons why countless Poodle owners embrace home grooming, and why you might too.
Cost Savings Over Professional Grooming
This is often the biggest motivator, and for good reason! Professional grooming sessions for a Poodle, especially a Standard Poodle with a full coat, can quickly run into significant figures per visit. When you consider that most Poodles need grooming every 4-8 weeks to prevent matting, those costs multiply throughout the year. It's not uncommon for a dedicated owner to spend hundreds, if not thousands, annually on professional grooming services.
Think about it: the initial investment in quality clippers and essential tools might seem steep, but it's a one-time (or at least, infrequent) cost that pays for itself rapidly. After just a few home grooming sessions, you'll likely have recouped your investment. For instance, imagine a Standard Poodle needing a full groom every six weeks. Over a year, that's eight or nine professional appointments. The savings from just half a year of home grooming can easily cover your equipment, leaving the rest as pure savings. This financial relief can free up funds for other important aspects of your Poodle's care, like high-quality food or fun training classes. You'll quickly see What Grooming Adds to a Poodle's Lifetime Cost and understand why so many owners look for alternatives.
Bonding and Comfort for Your Poodle
Beyond the financial aspect, there's an incredible benefit to grooming your Poodle yourself: the strengthening of your bond. Poodles are intelligent and sensitive dogs. When they're being groomed by a trusted owner in a familiar environment, it can be a much less stressful experience than a bustling salon with unfamiliar people and dogs. You can take breaks when needed, offer comforting words and treats, and adjust your pace to your Poodle's comfort level.
For Poodles who might be a bit shy, anxious, or have specific sensitivities (like being wary of their ears or feet handled), home grooming allows you to introduce tools and sensations gently and positively. You become the source of comfort and care, rather than a stranger. This consistent, gentle handling reinforces trust and can make future grooming sessions much smoother. Over time, your Poodle can come to view grooming not as an ordeal, but as a quiet, reassuring time spent with their favorite human. It's a prime example of Learning to Clip a Poodle at Home and how rewarding it can be.
Convenience and Schedule Flexibility
Life with a Poodle is busy, and fitting in regular grooming appointments can feel like a logistical puzzle. You have to book weeks in advance, arrange drop-off and pick-up times, and then spend hours without your furry shadow. When you groom at home, you dictate the schedule. A little trim on a lazy Sunday afternoon? Absolutely. A quick tidy-up before guests arrive? No problem.
This flexibility is invaluable, especially if your Poodle's coat suddenly develops a mat or gets unusually dirty. You don't have to wait for an appointment; you can address issues as they arise, preventing minor tangles from becoming major problems. It also means you can easily maintain a shorter, more practical clip, keeping your Poodle comfortable and clean without the constant salon visits. This freedom allows you to seamlessly integrate grooming into your life, making it a regular, manageable part of Poodle ownership rather than a calendar headache.
Essential Tools for Home Poodle Grooming
Successfully clipping your Poodle at home starts with having the right equipment. Skimping here can lead to frustrating experiences, poor results, and even discomfort for your dog. Think of it as investing in your new hobby – having the proper tools makes all the difference.
Choosing the Right Clippers and Blades
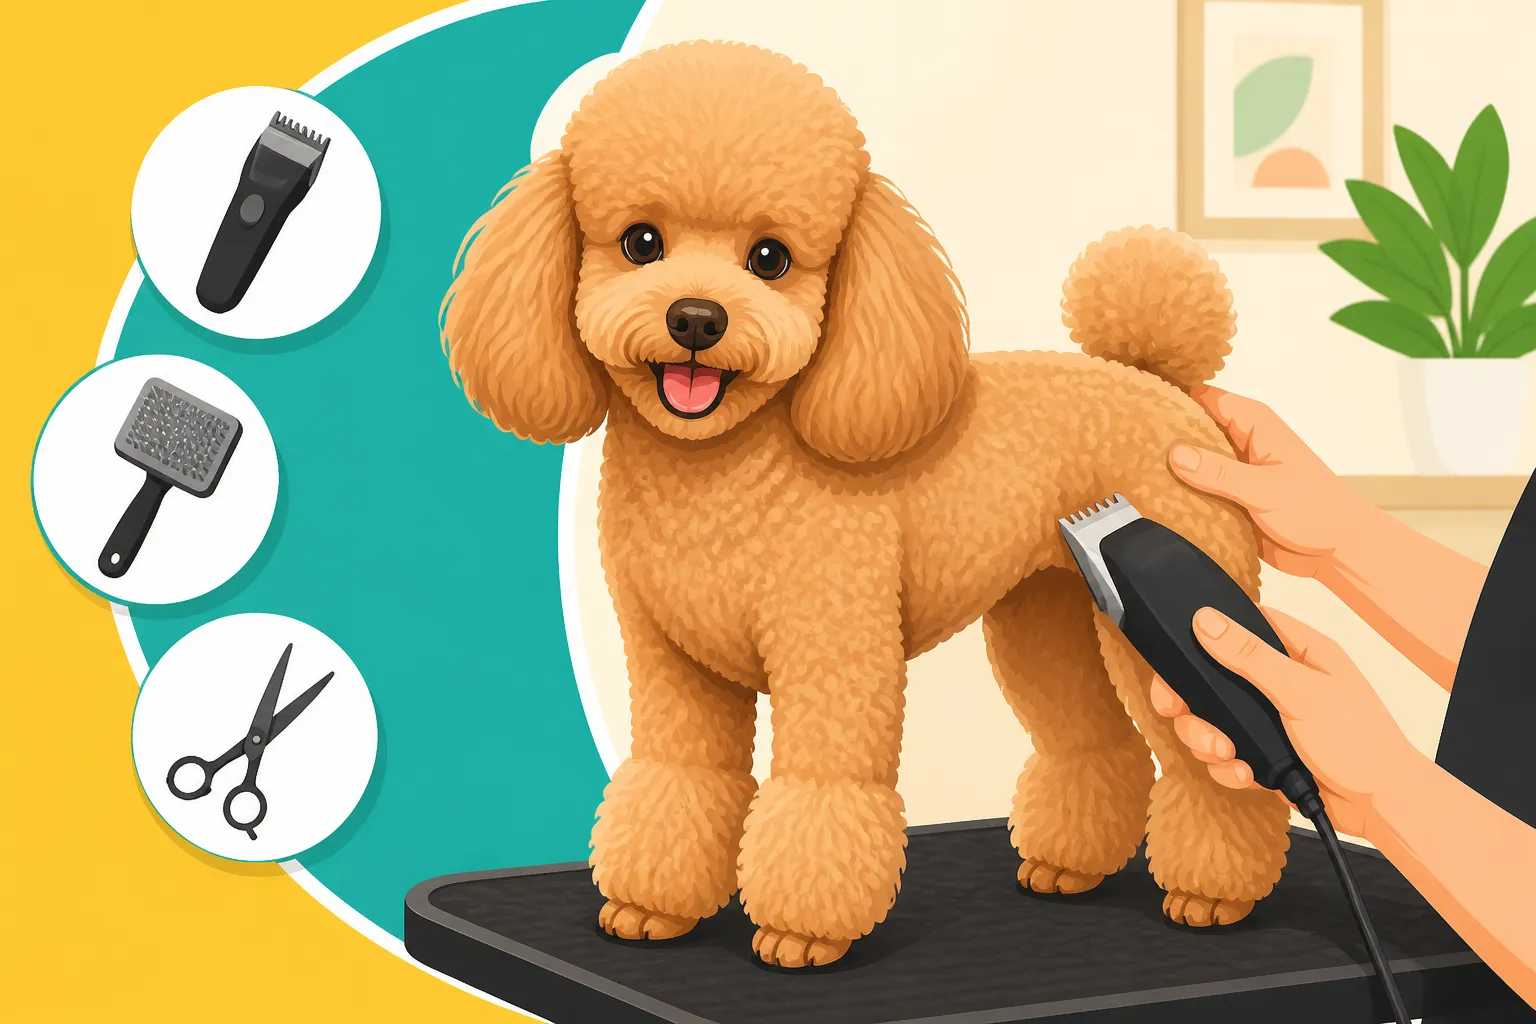
This is arguably the most critical decision you'll make. Not all clippers are created equal, especially when it comes to a dense, curly Poodle coat. You'll need a heavy-duty, professional-grade clipper that can handle thick hair without bogging down or overheating. Brands like Andis, Oster, and Wahl Professional are popular choices among groomers and experienced home users. Look for a two-speed or variable-speed model. The lower speed is often quieter and cooler for sensitive areas, while the higher speed tackles dense body coat efficiently.
Beyond the clipper itself, the blades are paramount. You'll need a variety of detachable blades (often referred to as A5 style blades). A good starting set might include:
- 10 blade: This is your all-purpose safety blade. It cuts hair very short (about 1/16 inch) and is ideal for sanitary areas, paw pads, and often the face. It's also a great blade to use with comb attachments for longer lengths.
- 30 blade: This blade cuts even shorter than a 10 and is primarily used for setting up surgical sites or for very short show clips. It is not recommended for general body clipping without a comb attachment, as it can easily cause clipper burn on sensitive Poodle skin.
- 7F blade: The "F" stands for "finish," meaning it leaves a smooth, finished look. It cuts hair to about 1/8 inch and is a good length for a neat, short body clip without going to the skin. It’s a workhorse for many pet Poodles.
- 5F blade: This cuts to about 1/4 inch and provides a slightly longer, still easy-care body length.
- 4F blade: Cutting to about 3/8 inch, this is a popular choice for a bit more coat length, offering good protection and a plush look.
You'll want to ensure you have a few of these, perhaps a backup #10, as blades can dull or overheat, requiring a swap during grooming. You can find a wide selection of these professional clippers and blades on sites like Amazon or Chewy, making it easy to get what you need delivered right to your door. For more guidance, check out Clippers Worth Buying for a Poodle.
Brushes, Combs, and Detangling Sprays
Before any clipping can happen, you need a thoroughly brushed and mat-free Poodle. Their non-shedding, continually growing hair is a magnet for tangles. Your essential tools here include:
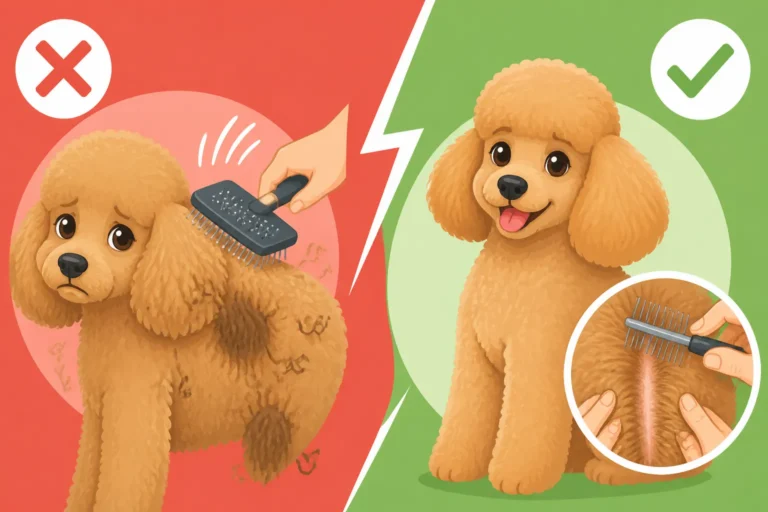
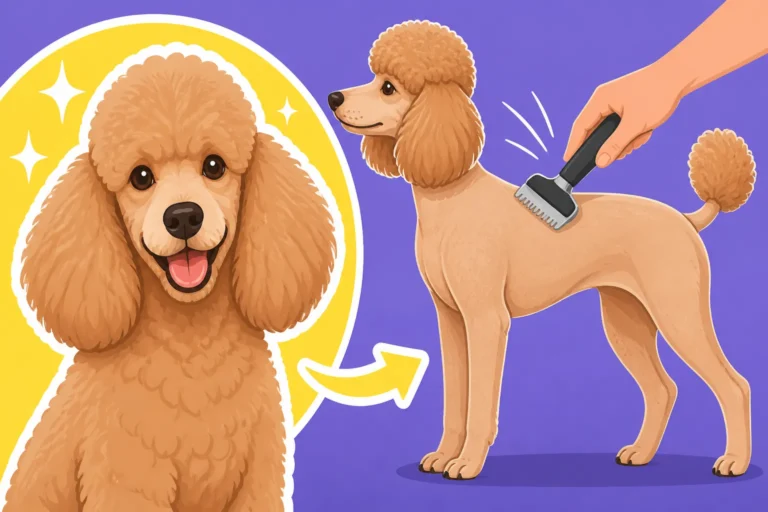
- Slicker Brush: A high-quality slicker brush with firm, angled pins is crucial for getting down to the skin and removing loose hair and small tangles. You'll use this constantly during the pre-clipping prep.
- Greyhound Comb: This metal comb, with teeth spaced at different widths, is indispensable for checking your work and ensuring there are no hidden mats. It should be able to glide smoothly through the coat from skin to tip. If it catches, there’s a mat.
- Detangling Spray: A good quality detangling spray or conditioning spray is your best friend when encountering stubborn tangles or when line brushing. It lubricates the hair, making it easier to separate without breaking or causing pain.
Remember, a clipper cannot cut through mats. Trying to do so will pull your Poodle's skin, damage your blades, and deliver very uneven results. Brushing is the foundation of a good clip. You'll learn more about the specifics of working with their unique coat in Why a Poodle Coat Mats Instead of Shedding and Line Brushing a Poodle Explained.
Grooming Table and Restraints
While it might seem like a luxury, a dedicated grooming table is a game-changer for home clipping. Trying to groom on the floor, on your lap, or on a wobbly kitchen counter is a recipe for back pain, an uncooperative Poodle, and potential accidents. A sturdy grooming table, ideally with a non-slip surface, elevates your Poodle to a comfortable working height.
Most grooming tables come with a grooming arm and a noose (or loop) that attaches to it. This isn't for punishment, but for safety and control. It keeps your Poodle from jumping off the table and helps keep them still while you work on delicate areas. Ensure the noose is properly fitted, snug enough to prevent slipping but never tight enough to cause discomfort or restrict breathing. It’s about creating a safe, controlled environment where both you and your Poodle feel more secure during the process. This dedicated setup, often called Setting Up a Poodle Grooming Corner at Home, will make your experience much smoother.
Preparing Your Poodle for a Home Clip
Grooming isn't just about the act of clipping; it's about the entire preparation process. Skimping on these crucial steps will lead to a frustrating experience, a less-than-stellar result, and potentially a fearful Poodle. Think of this as laying the groundwork for success.
The Importance of a Clean, Dry, and Mat-Free Coat
This step cannot be overemphasized. Clippers must glide through clean, dry, and mat-free hair. If you try to clip a dirty or damp coat, you'll encounter a myriad of problems:
- Dull Blades: Dirt and grit act like sandpaper on your clipper blades, dulling them almost instantly. This means you'll spend more money on sharpening or replacement much sooner.
- Uneven Cut: Clippers won't cut smoothly through dirty or matted hair, resulting in a choppy, uneven coat that looks unprofessional.
- Overheating: Dirty hair creates more friction, causing your clipper blades to heat up faster, which can lead to uncomfortable clipper burn for your Poodle.
- Skin Irritation: Pulling at mats and trying to force clippers through resistance is painful for your dog and can cause skin irritation or even cuts.
So, before you even think about picking up the clippers, your Poodle needs a thorough bath, conditioning, and especially, complete drying. Use a high-quality dog shampoo and conditioner, rinse meticulously, and then dry their coat completely with a high-velocity dryer if possible, brushing as you go to get it straight. This ensures the hair stands out and is easy to cut evenly. You can learn more about this in Bathing and Drying a Poodle. Afterward, spend ample time with your slicker brush and greyhound comb, methodically line brushing every inch of your Poodle's body until the comb glides through with no resistance. This ensures every last mat is found and gently worked out. Even small mats can cause significant issues when clipping. How Often a Poodle Must Be Brushed emphasizes the ongoing need for this critical step.
Desensitizing Your Poodle to the Equipment
Poodles are smart, but they're also sensitive. The buzzing sound and vibration of clippers, the blast of a high-velocity dryer, and the feel of brushes can be intimidating if they're not introduced properly. Start this process long before you actually plan to groom.
- Introduce Clippers: Turn on the clippers (without a blade) near your Poodle. Let them hear the sound, offering treats and praise for calm behavior. Gently touch the back of the clippers to their body, letting them feel the vibration. Do this in short, positive sessions.
- Familiarize with Brushes/Combs: Make brushing a daily, pleasant experience. Use gentle strokes, focusing on areas Poodles often dislike, like their ears and feet. Always reward with high-value treats.
- Grooming Table Practice: Introduce the grooming table as a positive place. Have them get on and off, standing calmly for short periods, receiving treats. Practice using the grooming loop.
The goal is to create positive associations with all grooming tools. If your Poodle shows signs of stress – lip licking, yawning, tail tucked, trying to escape – stop, take a break, and try again later with lower intensity. Patience and positive reinforcement are key to building a Poodle that tolerates, and even enjoys, their grooming routine.
Setting Up Your Grooming Space
Your environment plays a huge role in the success of your home grooming session. Choose a quiet, well-lit area where you won't be interrupted. A laundry room, a quiet corner of a garage, or even a bathroom can work perfectly. Ensure the floor is easy to clean, as Poodle hair will be everywhere!
Lay out all your tools within easy reach: clippers, blades, cooling spray, clipper oil, brushes, combs, detangling spray, a towel, and plenty of high-value treats. Having everything organized means you won't have to leave your Poodle unattended on the table to search for a missing item. Make sure the table is stable and well-lit from above, allowing you to clearly see your work and prevent accidental nicks. A dedicated, comfortable space signals to your Poodle that this is "grooming time" and can help them settle into the routine more easily.
Understanding Basic Poodle Clips for Home
Poodles are famous for their fancy show clips, but for the average pet owner, practicality and ease of maintenance are usually the top priorities. Thankfully, there are many lovely, simple clips you can achieve at home that keep your Poodle comfortable, clean, and looking sharp.
The Practicality of a Puppy or Kennel Clip
When you're first starting out with home grooming, less is often more. The "Puppy Clip" or "Kennel Clip" are fantastic choices because they are straightforward, forgiving, and incredibly functional.
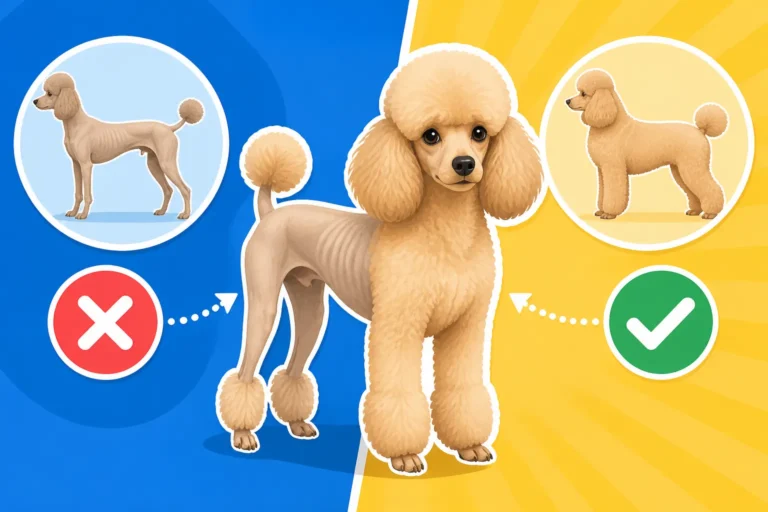
- Puppy Clip: This style leaves the hair on the body all one length, typically anywhere from 1/2 inch to 1 inch, depending on your preference and blade choice. The legs, body, head, and tail are all blended seamlessly. It's often called a "Teddy Bear" clip when done a bit longer. This clip is easy to maintain, keeps your Poodle warm enough in cooler weather, and prevents most matting issues if brushed regularly. It's a soft, youthful look that suits almost any Poodle.
- Kennel Clip: Similar to the puppy clip, the kennel clip is often a bit shorter, usually using a #4F or #5F blade on the body, leaving about 1/4 to 3/8 inch of hair. The hair on the face, feet, and tail is typically shaved short, creating a very clean and low-maintenance look. This is especially good for active Poodles who enjoy swimming or getting dirty, as it's quick to dry and less prone to mats.
Both of these clips allow you to practice your technique on a mostly uniform length of coat, which is much less intimidating than trying to sculpt complex patterns. They prioritize comfort and cleanliness, making them ideal for a happy, healthy pet Poodle. For more insight into these styles, consider The Practicality of a Puppy or Kennel Clip.
Clipping Face, Feet, and Tail (FFT)
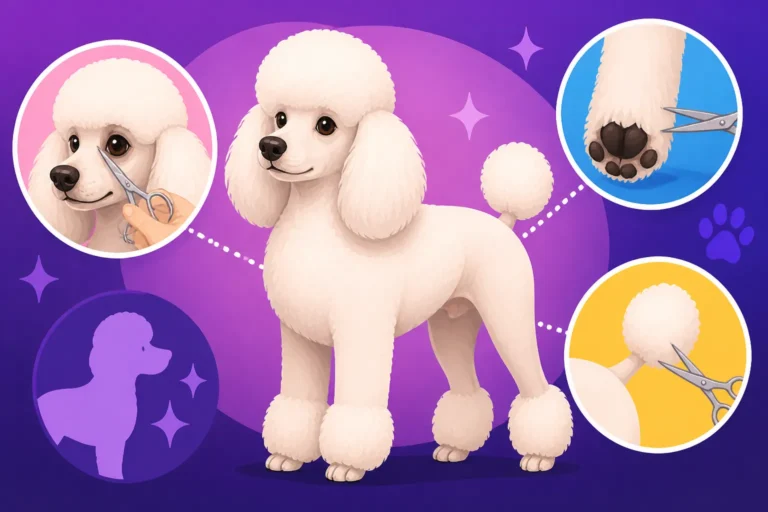
Regardless of the body clip you choose, the "Face, Feet, and Tail" (FFT) clip is a hallmark of Poodle grooming and essential for hygiene and breed identity. These areas are typically shaved very short using a #10 blade (or sometimes a #15 for an even shorter look if your Poodle tolerates it well).
- Face: Shaving the face involves carefully clearing the hair around the muzzle, cheeks, and often up between the eyes and to the corner of the ears. This not only gives the Poodle its distinctive elegant look but also prevents food, dirt, and discharge from accumulating in facial hair, which can lead to stains and skin irritation. Take your time, stretch the skin taut, and be extremely careful around the eyes, nose, and lips.
- Feet: The Poodle's feet are traditionally shaved short, exposing the nails and paw pads. This is crucial for cleanliness, preventing painful mats between the toes, and allowing for better traction. It involves carefully lifting each foot and shaving from the nail bed to the ankle joint. Again, stretch the skin and work carefully around the delicate pads and dewclaws.
- Tail: The base of the tail is typically shaved short, often leaving a pom-pom or a flag of longer hair at the tip. This area is important for sanitation, as it prevents feces from clinging to the fur.
Mastering the FFT requires patience and precision. It’s often best to practice these areas in short bursts, rewarding frequently. A fresh, sharp #10 blade is essential for a clean finish and to minimize irritation.
Body Clipping Techniques and Blade Lengths
Once your Poodle is clean, dry, mat-free, and you've decided on a general length, you can approach the body.
- Blade Lengths: As mentioned earlier, blades like the #7F (1/8 inch), #5F (1/4 inch), and #4F (3/8 inch) are popular for body clipping. For longer lengths without going to a full scissor trim, you can use comb attachments (often called "snap-on combs" or "guard combs") over a #10 or #30 blade. These plastic or metal attachments fit over the blade and allow you to leave hair anywhere from 1/2 inch to over an inch long.
- Direction of Clip: For a smooth, even finish, you almost always clip with the direction of hair growth on the body. Clipping against the grain will result in a much shorter cut and can sometimes leave track marks or irritate the skin.
- Consistent Strokes: Use long, smooth, overlapping strokes. Don't press down hard; let the clipper do the work. Overlap each stroke slightly to avoid leaving lines or missed patches. Imagine you're mowing a lawn.
- Checking for Evenness: Step back frequently to check your work. Run your hand over the clipped areas to feel for any uneven spots. Use your comb to lift the hair and visually check for a consistent length.
Remember that practice makes perfect. Your first few clips might not be showroom perfect, but they will be functional and improve with each session. Focus on keeping your Poodle comfortable and the cut even. A handy table can help you visualize the different blade lengths and their approximate results:
| Blade Number | Approximate Hair Length Left | Common Uses for Poodles | Notes for Home Grooming |
|---|---|---|---|
| #10 | 1/16 inch | Face, feet, tail base, sanitation areas | Essential for clean FFT; use carefully on body |
| #7F | 1/8 inch | Very short body clip, summer cuts | Smooth finish, good for low maintenance |
| #5F | 1/4 inch | Short body clip, easy care | Slightly plush, still very manageable |
| #4F | 3/8 inch | Medium-short body clip, popular pet cut | Good protection, softer look |
| Comb Attachments (over #10 or #30 blade) | |||
| 1/2 inch | 1/2 inch | Longer puppy/kennel clip, blended areas | Requires very clean, mat-free coat |
| 5/8 inch | 5/8 inch | Plush body clip | Good for a fuller look without excessive length |
| 3/4 inch | 3/4 inch | Fuller body clip, softer appearance | More brushing required, but lovely style |
Step-by-Step Guide to Clipping Your Poodle
Now that you have your tools ready and your Poodle prepped, it's time to get down to business. Approach this with patience and a positive attitude, and your Poodle will pick up on your calm demeanor. Remember, breaks are always an option!
Brushing and Dematting Thoroughly
Before any clipper touches your Poodle, a final, meticulous brush-out is essential. Even if you bathed and dried them perfectly, a few hours or a short romp outside can introduce new tangles. This is where your slicker brush and greyhound comb earn their keep.
- Section by Section: Don't try to tackle the entire dog at once. Work in small sections, starting from the paws and working your way up the legs, then onto the body, neck, and head.
- Line Brushing: This technique is crucial for Poodles. Part the hair down to the skin, and brush the hair from the skin out, slowly letting new sections fall over the brushed area. This ensures you get every single strand.
- Comb Check: After you've brushed a section, run your greyhound comb through it. If the comb snags or doesn't glide smoothly from skin to tip, there's a mat. Don't proceed with clipping until it's worked out. Use your detangling spray and gently tease apart the mat with your fingers, then brush it out. Never pull. If a mat is too tight and close to the skin, it's safer to carefully clip under it with a #10 blade or, if truly severe, to call a professional for assistance to avoid injury.
Taking your time here prevents painful snags and ensures a smooth, even clip. Rushing this step is the fastest way to a bad grooming experience for both of you.
The Art of Shaving Pads, Sanitation, and Face
These areas are traditionally shaved very short and require extra care due to delicate skin and prominent features. Use your #10 blade, ensuring it's cool.
- Paw Pads: Lift each paw, gently spreading the toes. Carefully shave the hair from between the paw pads, working outwards. Ensure the blade doesn't get too hot; use cooling spray. Trim the hair that grows past the paw pads to be even with the pads themselves. This prevents slipping and accumulation of debris.
- Sanitation Area: For males, shave a small oval area around the sheath. For females, shave from just under the tail down to the vulva. This prevents urine and feces from matting the hair and keeps them clean. Always shave with the grain of the hair in these sensitive areas.
- Face: This is often the most challenging part for new groomers.
- Muzzle: Start by shaving the top of the muzzle, from just below the eyes down to the nose, with the grain. Gently stretch the skin.
- Cheeks: Carefully shave the cheeks, stretching the skin away from the eye and mouth corners.
- Under Chin/Throat: Shave down the throat, often meeting the body clip.
- Between Eyes: Very carefully, with just the edge of the blade, clear the hair between the eyes.
- Ears: Shave the inside of the ear flap about an inch or two down from the ear canal opening. You can also shave the outer part of the ear flap, stopping at the edge of the ear leather, or leave it longer for a "fluffy ear" look.
Always stretch the skin taut in these areas to prevent nicks, and take frequent breaks. Reward your Poodle often for standing still. Remember, clipper blades can get hot quickly on these fine hairs, so cooling spray is your friend. Trimming a Poodle's Face Clean goes into more detail.
Body Clipping: Strategy and Safety
Once the FFT is done, move to the body. Choose your desired blade length (e.g., #4F, #5F, #7F, or a comb attachment over a #10 blade).
- Start with the Back: Begin clipping down the spine, working from the neck towards the tail. Use long, smooth, overlapping strokes, going with the direction of the hair growth for a smoother finish.
- Sides and Chest: Move down the sides, then carefully clip the chest and belly. When clipping the belly, lift your Poodle's front legs slightly to get access, and be very gentle around nipples and any loose skin.
- Legs: Decide if you're leaving the legs longer or clipping them to the same length as the body. For the latter, continue your body clipping down the legs. Blend where the shaved feet meet the leg hair.
- Blend, Blend, Blend: The key to a professional-looking home clip is blending. As you move from one area to another, try to overlap your strokes slightly to avoid harsh lines. If you're using a comb attachment on the body and plan to scissor the legs, you'll need to create a smooth transition.
- Check Blade Temperature: Periodically touch the blade to the back of your hand. If it feels warm to you, it's too hot for your Poodle's skin. Swap to a cool blade or use clipper cooling spray. Ignoring a hot blade can cause Clipper Burn on a Closely Trimmed Poodle.
Stay calm and confident. If your Poodle gets restless, take a short break, offer a treat, and resume when they're settled. Focus on keeping both of you safe and comfortable.
Finishing Touches: Ears, Nails, and Bath (Post-clip)
You're almost there! Once the clipping is done, there are a few final steps to make your Poodle look their best and ensure their overall comfort.
- Ears: After clipping the face, decide what to do with the ear leather itself. Many pet Poodles have the ear hair left long, but it still needs to be clean and brushed. Check for any stray hairs the clippers missed. If you've chosen to shave the outside of the ear, ensure it's even. Now is also a good time to check and clean their ears internally. Poodles with their dropped ears are prone to ear infections due to trapped moisture and hair. Gently pluck any excess hair from the ear canal (if you are comfortable doing so and your Poodle tolerates it) and clean with a vet-approved ear cleaner.
- Nails: Even if you trim nails regularly, give them a final check. Use a grinder or clippers to shorten them, ensuring you don't cut into the quick. Overly long nails can cause discomfort and impact their gait.
- Final Bath and Dry: While you bathed your Poodle before clipping, a quick bath after the clip is highly recommended. This washes away any stray hairs that might be itchy or irritating, thoroughly cleans the skin, and helps reveal any missed spots or uneven patches that might need a touch-up. Follow with another thorough drying and a final brush-out to fluff up their fresh coat. This also helps ensure their skin is completely clean after having clippers run over it.
This post-clip routine completes the grooming cycle, leaving your Poodle feeling fresh, clean, and looking fantastic.
Troubleshooting Common Home Grooming Challenges
Even with the best intentions and tools, you're bound to run into a snag or two when clipping at home. Don't get discouraged! These are common issues, and there are tried-and-true ways to tackle them.
Dealing with Mats and Tangles
Mats are the bane of every Poodle owner's existence. If you find a mat during the final brush-out before clipping, or even worse, while clipping, it needs immediate attention.
- Prevention is Key: The absolute best way to deal with mats is to prevent them in the first place through regular, thorough Brushing a Poodle to the Skin.
- Small Mats: For small, loose mats, saturate the area with a detangling spray, and gently work it apart with your fingers, then use the corner of your slicker brush or a wide-toothed comb. Work from the outside edges of the mat inwards, never pulling directly on the mat itself.
- Tight Mats: If a mat is very tight and close to the skin, do not try to pull or cut it out with scissors unless you are extremely experienced. It's incredibly easy to cut your Poodle's skin under a mat. The safest option for very tight mats is to carefully clip under the mat with a #10 blade, using just the very edge of the blade and keeping it flat against the skin while stretching the skin away from the blade. This will leave a bald spot but is far safer than a laceration. In severe cases, a professional groomer may be needed to safely remove the mats. Remember, trying to clip through a mat with any blade other than a #10 will likely damage your clippers and blades, and cause significant discomfort to your Poodle.
Clipper Burn and Skin Irritation
Clipper burn is a common issue, especially for new groomers or when blades get too hot. It manifests as red, irritated skin, sometimes with bumps, and can be quite uncomfortable for your Poodle.
- Keep Blades Cool: The primary cause is an overheated blade. Always have at least two of your main body blades (e.g., two #5F blades) so you can swap them out when one gets warm. Use a cooling spray on blades frequently, and clean them between uses. Never let a blade feel hot on the back of your hand before touching your Poodle.
- Proper Technique: Avoid pressing down too hard with the clippers. Let the blade glide effortlessly over the skin. Stretch the skin taut to create a flat surface for the blade, reducing friction and the chance of pinching loose skin.
- Post-Grooming Care: If you notice redness, apply a soothing, pet-safe balm or spray. Monitor the area, and if it worsens or doesn't improve, consult your vet. A light, breathable coat or shirt can protect irritated skin for a day or two. Remember that prevention is better than treatment when it comes to Clipper Burn on a Closely Trimmed Poodle.
Anxiety and Wriggling Poodles
Some Poodles are naturally more sensitive or simply dislike grooming. A wiggly Poodle can make clipping not only difficult but dangerous.
- Positive Reinforcement: Consistently use high-value treats and praise for calm behavior. Even if your Poodle only stays still for a few seconds, reward that moment generously.
- Short Sessions: Break grooming into very short sessions, especially when introducing new tools or working on sensitive areas. It's better to do a little bit each day than to force a long, stressful session.
- Grooming Loop: The grooming loop on your table is a safety tool. It helps to keep your Poodle in position and prevents them from jumping off. Ensure it's snug but not tight. You can use two loops for extra security – one around the neck and one around the belly, ensuring both are loose enough for comfort but provide gentle restraint.
- Patience and Calm: Your demeanor is infectious. If you're stressed, your Poodle will be too. Take deep breaths, speak in a calm, soothing voice, and remember that slow and steady wins the race. If you're both getting frustrated, take a break.
- Professional Help: If your Poodle's anxiety is severe and you're struggling to make progress, consider consulting a professional groomer who specializes in fearful dogs or a veterinary behaviorist. They can offer specific strategies or even medication to help your Poodle cope.
Maintaining Your Grooming Equipment
Just like a chef maintains their knives, a good home groomer cares for their tools. Proper maintenance not only extends the life of your expensive equipment but also ensures a better, safer grooming experience for your Poodle. Dull or dirty tools won't cut well and can cause discomfort.
Cleaning and Oiling Clipper Blades
This is perhaps the most important aspect of equipment maintenance. Clipper blades need to be cleaned and oiled before, during, and after each grooming session.
- Before and After: Before you begin and immediately after you finish, use a blade brush to remove all hair from the blade. Then, spray it liberally with a blade cleaning/cooling spray. While the clipper is running, add a few drops of clipper oil across the teeth of the blade and along the sides where the moving parts meet. This lubricates the blade, reduces friction and heat, and protects against rust. Run the clipper for a few seconds to distribute the oil, then wipe off any excess with a clean cloth.
- During Grooming: As you clip, especially if you're working on a larger Poodle, blades will heat up and collect hair. Stop periodically, brush the hair off the blade, spray with cooling spray, and re-oil. Having multiple blades allows you to swap to a cool, clean blade while the hot one cools down.
- Storage: Always store clean, oiled blades in a protective case or container to prevent damage to the teeth and to keep them free from dust and moisture.
Neglecting to clean and oil your blades will drastically shorten their lifespan, lead to poor cutting performance, and increase the risk of clipper burn for your Poodle.
Sharpening and Replacement Schedules
Even with meticulous cleaning and oiling, clipper blades will eventually dull. A dull blade will snag hair, leave track marks, pull at the coat, and cause discomfort.
- Signs of a Dull Blade: The most obvious sign is when the clipper stops cutting smoothly. If you have to go over the same spot multiple times, or if your Poodle shows discomfort or irritation even with a cool blade, it's likely dull.
- Sharpening: Professional clipper blades can be sharpened. There are services that specialize in this, and it's generally more cost-effective than constantly buying new blades. Research local or mail-in sharpening services. The frequency depends on how often you groom and how well you maintain your blades, but for a single Poodle groomed every 6-8 weeks, a blade might need sharpening every 6-12 months.
- Replacement: Blades don't last forever. After multiple sharpenings, or if a blade is damaged (e.g., dropped, chipped teeth), it's time to replace it. A chipped tooth on a blade can cut your Poodle's skin. Over time, you'll get a feel for which blades wear out fastest (often the #10, due to its frequent use). Factor in these replacement costs when budgeting your home grooming expenses, though they'll still be significantly less than salon visits. What Poodle Clippers and Blades Cost will give you an idea of the investment.
Storing Your Tools Properly
Good storage protects your investment and keeps your grooming corner organized.
- Clippers: Store your clippers in their original case or a dedicated clipper bag to protect them from dust, moisture, and accidental drops. Ensure the cord is neatly wrapped without kinks.
- Blades: As mentioned, store blades in a proper blade case. These cases usually have individual slots that prevent the blades from knocking against each other and dulling the cutting edge.
- Brushes and Combs: Keep brushes and combs clean by removing all hair after each use. Store them in a container or drawer to keep them tidy and hygienic.
- Liquids: Store shampoos, conditioners, detangling sprays, cooling sprays, and oils upright in a cupboard or shelf, away from direct sunlight or extreme temperatures. Ensure caps are tightly sealed.
Having a designated "Poodle grooming kit" or a cart on wheels can be incredibly helpful for keeping everything together and portable if you need to move your setup. Proper storage not only prolongs the life of your equipment but also makes your next grooming session much more efficient and enjoyable.
Disclaimer
This article is for general informational purposes only and does not constitute professional advice. Laws, prices and regulations vary by location and change over time. Consult a qualified professional for guidance on your specific situation.